Change the line spacing in Word

You can control the vertical space between the lines of text in your document by setting the line spacing. Or, you can change the vertical space between paragraphs in your document by setting the spacing before or spacing after paragraphs. You can also choose to keep lines of text together or keep paragraphs together on a page.

Change the line spacing in an entire document

  1. Go to Design >Paragraph Spacing.
  2. Choose an option. To single space your document, select No Paragraph Space.

To return to the original settings later, go to Design > Paragraph Spacing and choose the option under Style Set. This may be Default or the name of style you’re currently using.

Change the line spacing in a portion of the document

Line and Paragraph Spacing button

  1. Select one or more paragraphs to update. Press Ctrl + A to select all.
  2. Go to Home >Line and Paragraph Spacing

Line spacing options

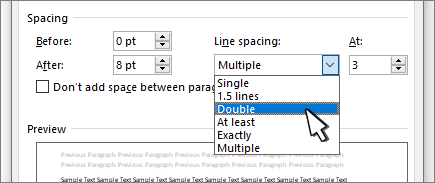
. Select Line Spacing Options and choose an option in the Line spacing box.

Change the line spacing in an entire document

On the Design tab, Paragraph Spacing is highlighted

  1. Go to Design >Paragraph Spacing.

This overrides the settings of the style you’re currently using. If you decide later to return to the original settings, go to Design > Paragraph Spacing and choose the option under Style Set. The option might be Default, as shown above, or it will show the name of style you’re currently using.

Change the line spacing in a portion of the document

On the Home tab, Line Spacing is hightlighted

  1. Select the paragraphs you want to change.
  2. Go to Home >Line and Paragraph Spacing.

Keep all lines in a paragraph together
  1. Select the paragraph whose lines you want to keep together.
  2. Go to Format >Paragraph >Line and Page Breaks.
  3. Select Keep lines together.